Create a Merchandise Package for PrismWeb
- Dawn Brunke (Unlicensed)
Merchandise Packages
PrismWeb allows you to sell merchandise packages (like computers, gift baskets, etc.) online. Shoppers can choose from different package options, depending on what you create in PrismCore ICS. First, you have to add package elements as items in Item Maintenance. Then, you will build a package-specific catalog in Catalog Maintenance to send to the web. Once the catalog has been sent to the web, the package can be viewed online. Shoppers use radio buttons and check boxes to make package-related selections before adding the package to the shopping cart.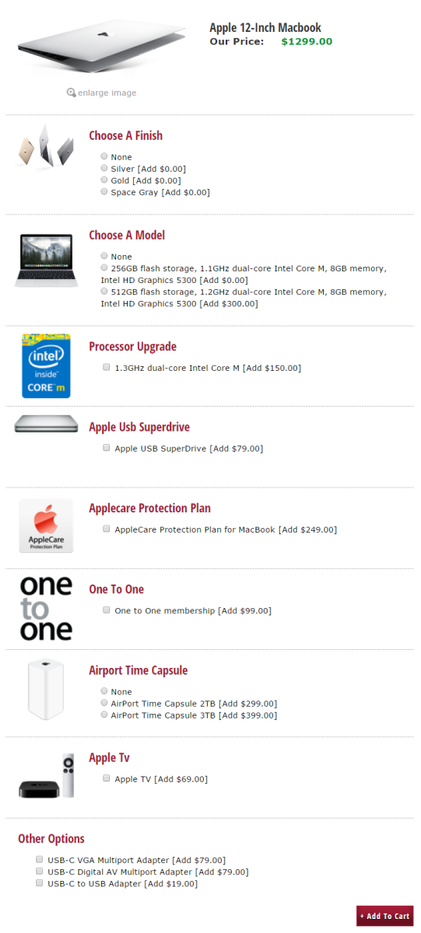
Note: Before attempting to create a package, please ensure that all package components are entered as items in PrismCore Item Maintenance.
The package base and the selected components will be individually listed in the shopping cart after the shopper clicks the Add to Cart button. 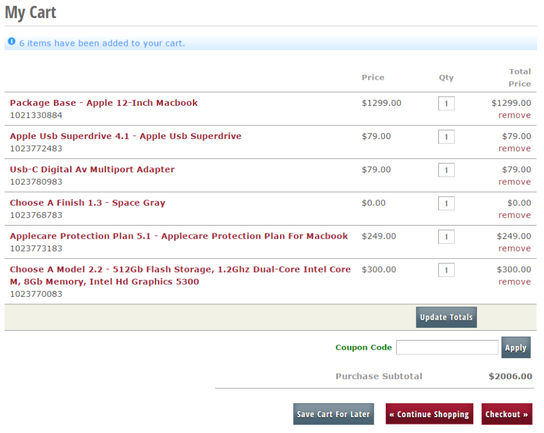
Creating a Merchandise Package
- In PrismCore ICS, go to Inventory Management > Mail Order > Catalog Maintenance (Ctrl+J 151).
- Click the Insert Record
 button.
 - Enter the catalog name in the Catalog field.
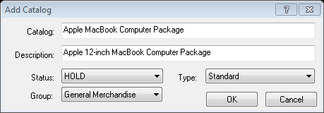
- Optionally, enter a description for the catalog in the Description field.
- From the Status menu, choose Hold.
- From the Group menu, choose a catalog group.
- From the Type menu, choose Standard.
- Click OK.
- Change the Start Date or Expire Date for the catalog, if desired.
- Select the Locations in which this catalog will be active.
- Manually add a single Package Base item as an individual product family. Use the below naming convention for the product family description.
Package Base Naming Convention: The Package Base product family description must follow this naming convention: Package Base – (Description)
Example: For our Apple MacBook, the product family description would be: Package Base – Apple 12-inch MacBook - Manually add each Package Component item as an individual product family. If you wish to control the grouping and order of the component items, follow the below naming convention for the product family descriptions. Package Component Naming Convention: You can group components together and control the order they appear by following this naming convention: (Component Group) (X.Y) – (Description)
The (Component Group) placeholder represents the name of your group of components. The (X.Y) placeholder allows you to control the order of the component groups with the X digit, and the order of the items within the component groups with the Y digit.
Example:
For our Apple MacBook, there is an option of three finishes, so they are placed and ordered in a component group like this:
Choose a finish 1.1 – Silver Choose a finish 1.2 – Gold Choose a finish 1.3 – Space Gray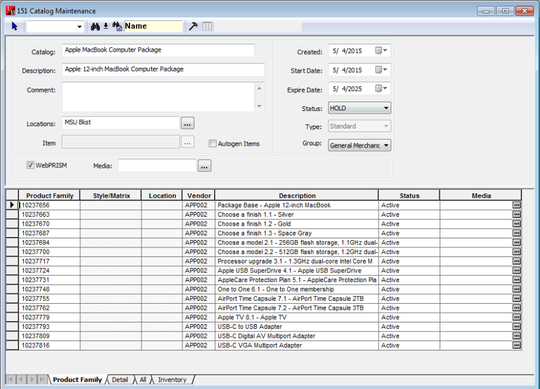
Miscellaneous Components: Any miscellaneous component items that you don't wish to have grouped will appear at the bottom of the package options on the website. You do not need to follow any specific naming convention for these items.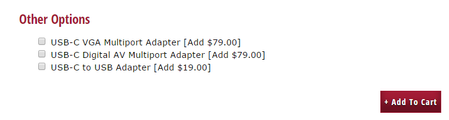
- After all product family descriptions in the catalog have been modified, check the PrismWeb box.
- Save the catalog or close Catalog Maintenance to send the catalog to PrismWeb. Since the status of the catalog is set to Hold, it will not be visible on the website – this is a good thing, because it wouldn't display correctly as a normal catalog. You can view the catalog in the PrismWeb Manager in 20-40 minutes.
- You will need to create a link to the package in order to make it available to shoppers. This is the proper link format: <a href="shop_package.asp?packageID=XX">Link Text or Image</a>
Note: XX is the package ID number, which can be found in the PrismWeb Manager- Go to Products > Catalogs.
- Click Edit next to the package catalog that you sent from PrismCore.
- The package ID number is the catalog ID number in the right column, under the Link to this catalog information.
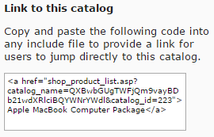
- In this example, the link code contains catalog_id=223, so the link to the package would look like this: <a href="shop_package.asp?packageID=223">Link Text or Image</a>
- Test your link on staging to verify it is working correctly, then deploy to your live site.