Adding Cashiers & Security Settings
Creating a Cashier for PRISM360
PLEASE NOTE – DO NOT ADD CASHIERS IN CLOUD ADMIN TOOL. Always add them in WPAdmin and allow them to flow to the cloud from there.
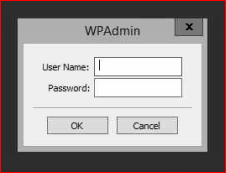
- Log in to WPAdmin.
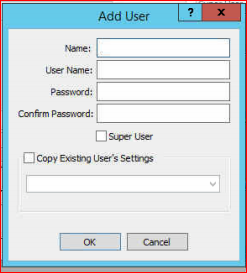
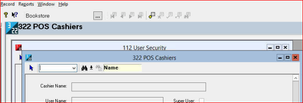
2, Select Configuration from top navigation bar. Go to WPAdmin\Inventory Control tab\Security\User Security. Add new user.
3. Set up cashier and/or manager account tab. Use the screen shots for cashier and/or manager.
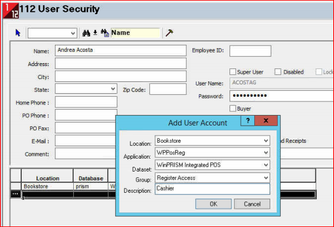
a. Cashier account. Click on the ellipse under location. Add User Account box appears. Use the screen shot to add Cashier.
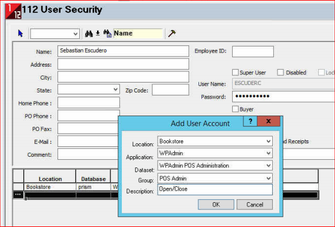
b. Manager account. Click on the ellipse under location. Add User Account box appears. Use the screen shot to add Open/Close Manager.
4. Select Configuration from top navigation bar. Go to Admin\POS tab\Parameters\Cashiers
a. Add cashier (yellow plus). You will get a store location window.
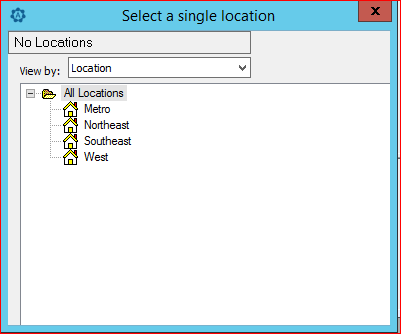
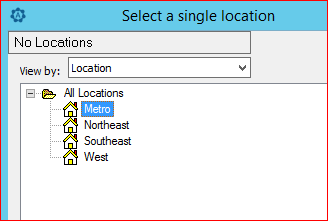
b. Select location.
c. A new window appears.
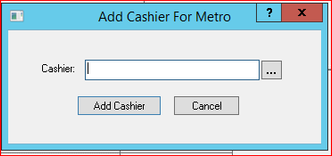
d. Click on the ellipsis to get select list, and select cashier. After being returned to the Add Cashier box, click on the Add Cashier button.
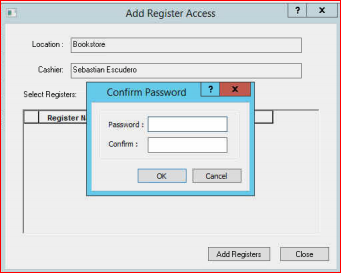
e. Type your password here.
f. When returned to the POS Cashiers window, click the ellipse or right-click and select Add Registers, highlight the registers this cashier may use, and click Add Registers button.
g. The added cashiers will flow to the Cloud server. Never add a cashier in the Cloud.
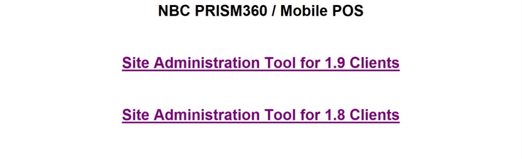
5. Log into Cloud Admin Tool.
a. Click the appropriate "Site Administration Tool" link for the store. If you are on PrismCore (WinPRISM) v28.1.13 or lower, you will use v1.8. Once you update to version 28.2.35 or higher, you will use v1.9.
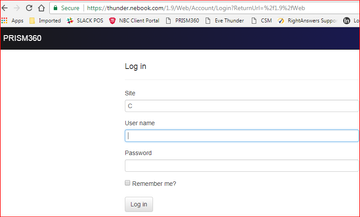
b. Log in with your credentials. The site is C plus your six-digit NBC account number.
c. Select Configuration from top navigation bar. Then select Security from the left bar.

d. Select Users tab. The list displays your users that flowed from WPAdmin to the Cloud server.
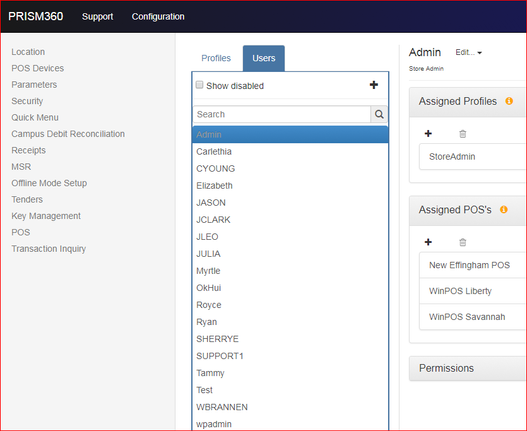
e. Assign User Profiles

All users default with register access. You may add other profiles by clicking the Plus + in the right margin under Assigned Profiles. Add a checkmark in the box next to the profile you wish to assign to user.
f. Assign POS locations
Click the Plus + in the right margin under Assigned POS's. Add a checkmark in the box next to the POS location you wish to assign to user.
g. Have cashier go to PRISM360 register login screen to change password. Sometimes you may find it easier to have cashier change password in PRISMCore first, before going to the register.
6. Select the PRISM360 or PRISM POS icon. Have Cashier login at PRISM360 register.
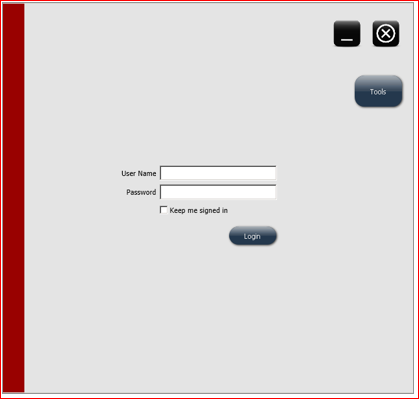
a. In the User Name field, type your assigned user name.
b. In the Password field, type your assigned password. Note: The checkbox "Keep me signed in" is not functional.
c. Select Login button
d. A window appears for the cashier to set a new password.
e. After cashier sets new password, the home screen appears.
To unlock user at PRISM360 register.
- Go to Cloud Admin Tool. Follow steps at number 5 to log in.
- Select Security\Users\Edit User

3. Remove checkmark for Account Locked. Note: Generally, user is locked out after six attempts.
4. Do not check the box for Reset Password. This will auto-generate a password and does not change PRISMCore or WinPRISM passwords. Instead, change password in WPAdmin\Inventory Control\Security\User Security.
Viewing/Editing Existing Security
1. To view or edit Security, click the 'Security' button in the menu on the left.
2. The Security information will display in the window to the right.
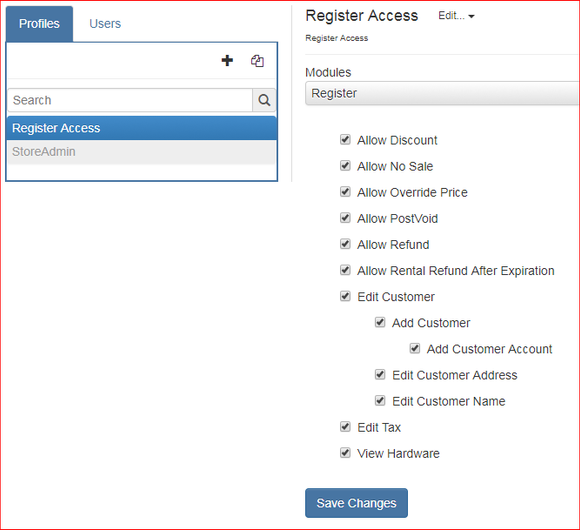
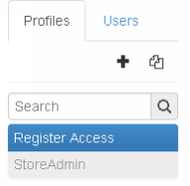
3. On the left side of the window, you can choose to view information about 'Profiles' or information about 'Users'. Profiles determine what menu options (left side of screen) each user attached to the profile can access when they log in. Users, assigned to profiles, are those individuals who log in. Logically, then, you must first add 'Profiles', and then add users, and assign each user to a profile. Therefore, for example, you could add a 'Register Access' profile, and give minimal rights to that profile. Then, you would add users, and assign the users you wished to have minimal rights to that profile.
4. Check the box for Store Admin if you want the user to have access to the cloud admin tool.
5. To view information about a specific profile, choose 'Profiles', and select which profile you wish to view. In this example, we are choosing the 'Register Access' Profile.
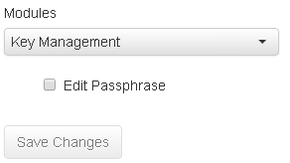
6. On the right, then, choose the module for which you wish to view the selected profile. There are seven modules available:
a. Key Management: This module allows you to select whether those in this profile can edit the passphrase.
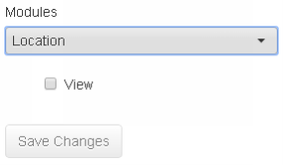
b. Location: This module allows you to determine whether those in this profile can view location information.
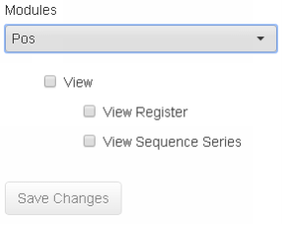
c. POS: This module allows you to determine whether those in this profile can view register or sequence series information.
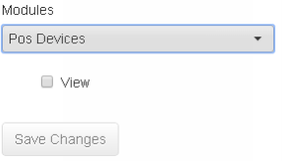
d. POS Devices: This module allows you to determine whether those in this profile can view POS devices.
e. Register: This module determines what rights those in this profile have when working on a register. The options are as follows:
i. Allow Discount
ii. Allow No Sale
iii. Allow Override Price
iv. Allow Post Void
v. Allow Refund
vi. Edit Customer
1. Add Customer
a. Add Customer Account
2. Edit Customer Address
3. Edit Customer Name
vii. Edit Tax
viii. View Hardware

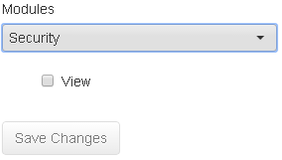
f. Security: This module determines whether those in this profile can view security information.
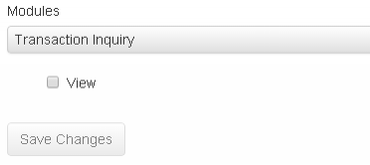
g. Transaction Inquiry: This module determines whether those in this profile can view Transaction Inquiry.
Exercises
- Create cashier 'temp1' using the steps to set up a cashier for PRISM360.
- Where in the cloud tool, do you unlock a cashier?
- You want to add a new profile for your floor supervisors to do post- voids. Add a new profile.
- You want to exclude regular cashiers to do post-voids. Where do you go to remove post-voids?